Multi detector visualizer
The multi detector visualizer allows visualization and manual integration of traces from other detectors.
To open the Multi detector visualizer, at least one data file in the project must contain data from other detectors. Only files with such traces will be eligible for the visualizer.
Visualizer layout
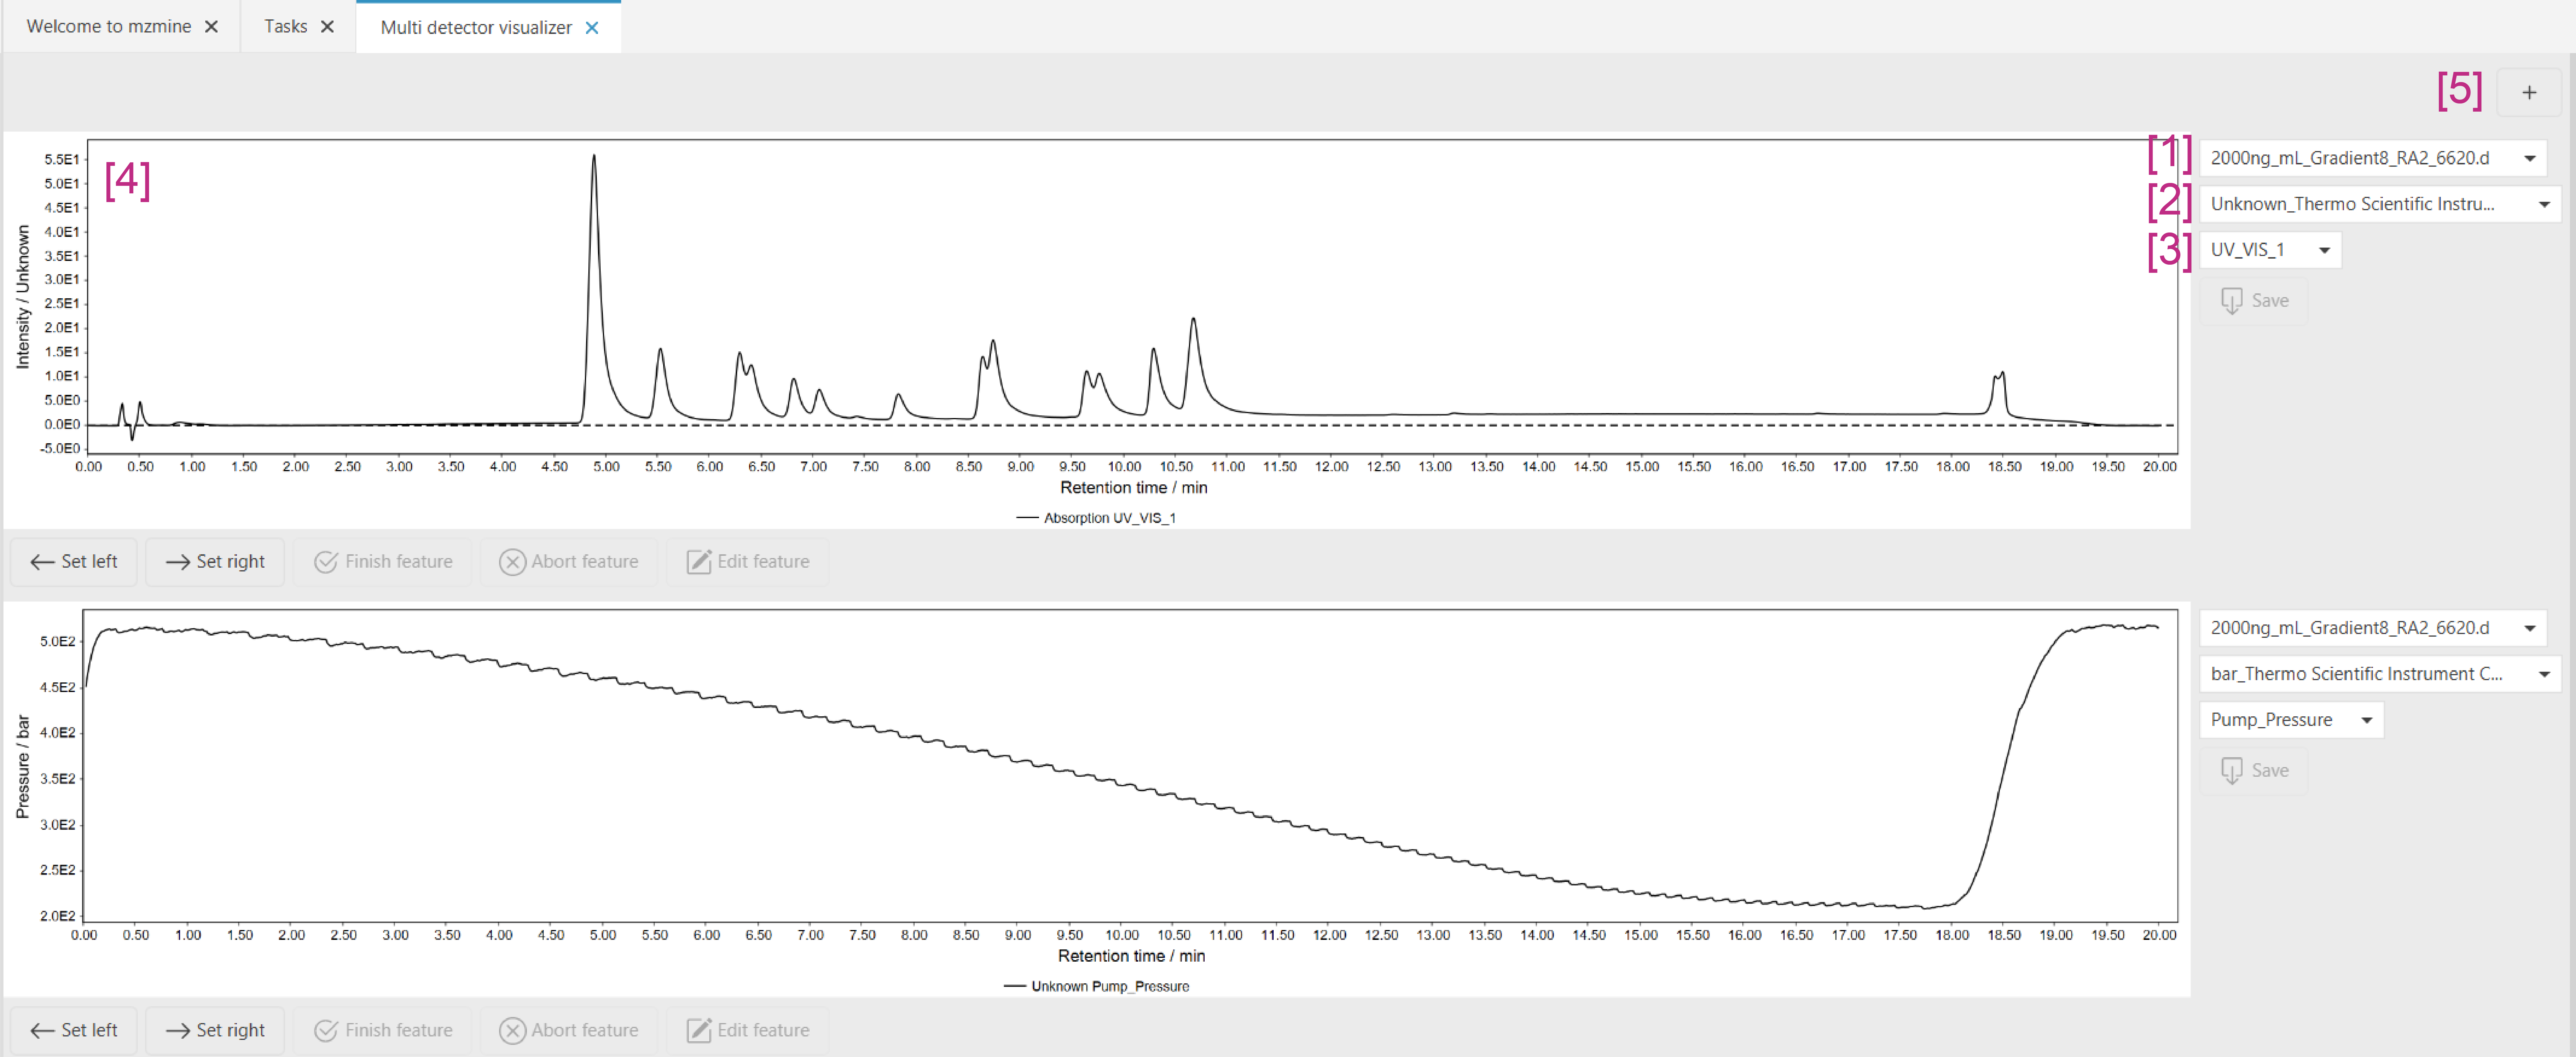
The visualizer is shown below:

- Select the data file you want to visualize. After importing a new data file, the visualizer must be reopened.
- This box lists the available detector traces for the selected files. The traces imported from the
raw data will be named as such:
<unit>_<detector name>and grouped by the unit of the detector. If they are created from other spectral data by the Chromatogram builder (Other spectral data), the Name parameter will be used. - Select the specific trace you want to visualize. In case there are preprocessed traces, these will be used for visualization and manual integration.
- The chromatogram chart shows the selected trace.
- In case you want to visualize multiple files/traces, you can add another chart by the + button.
Manual integration
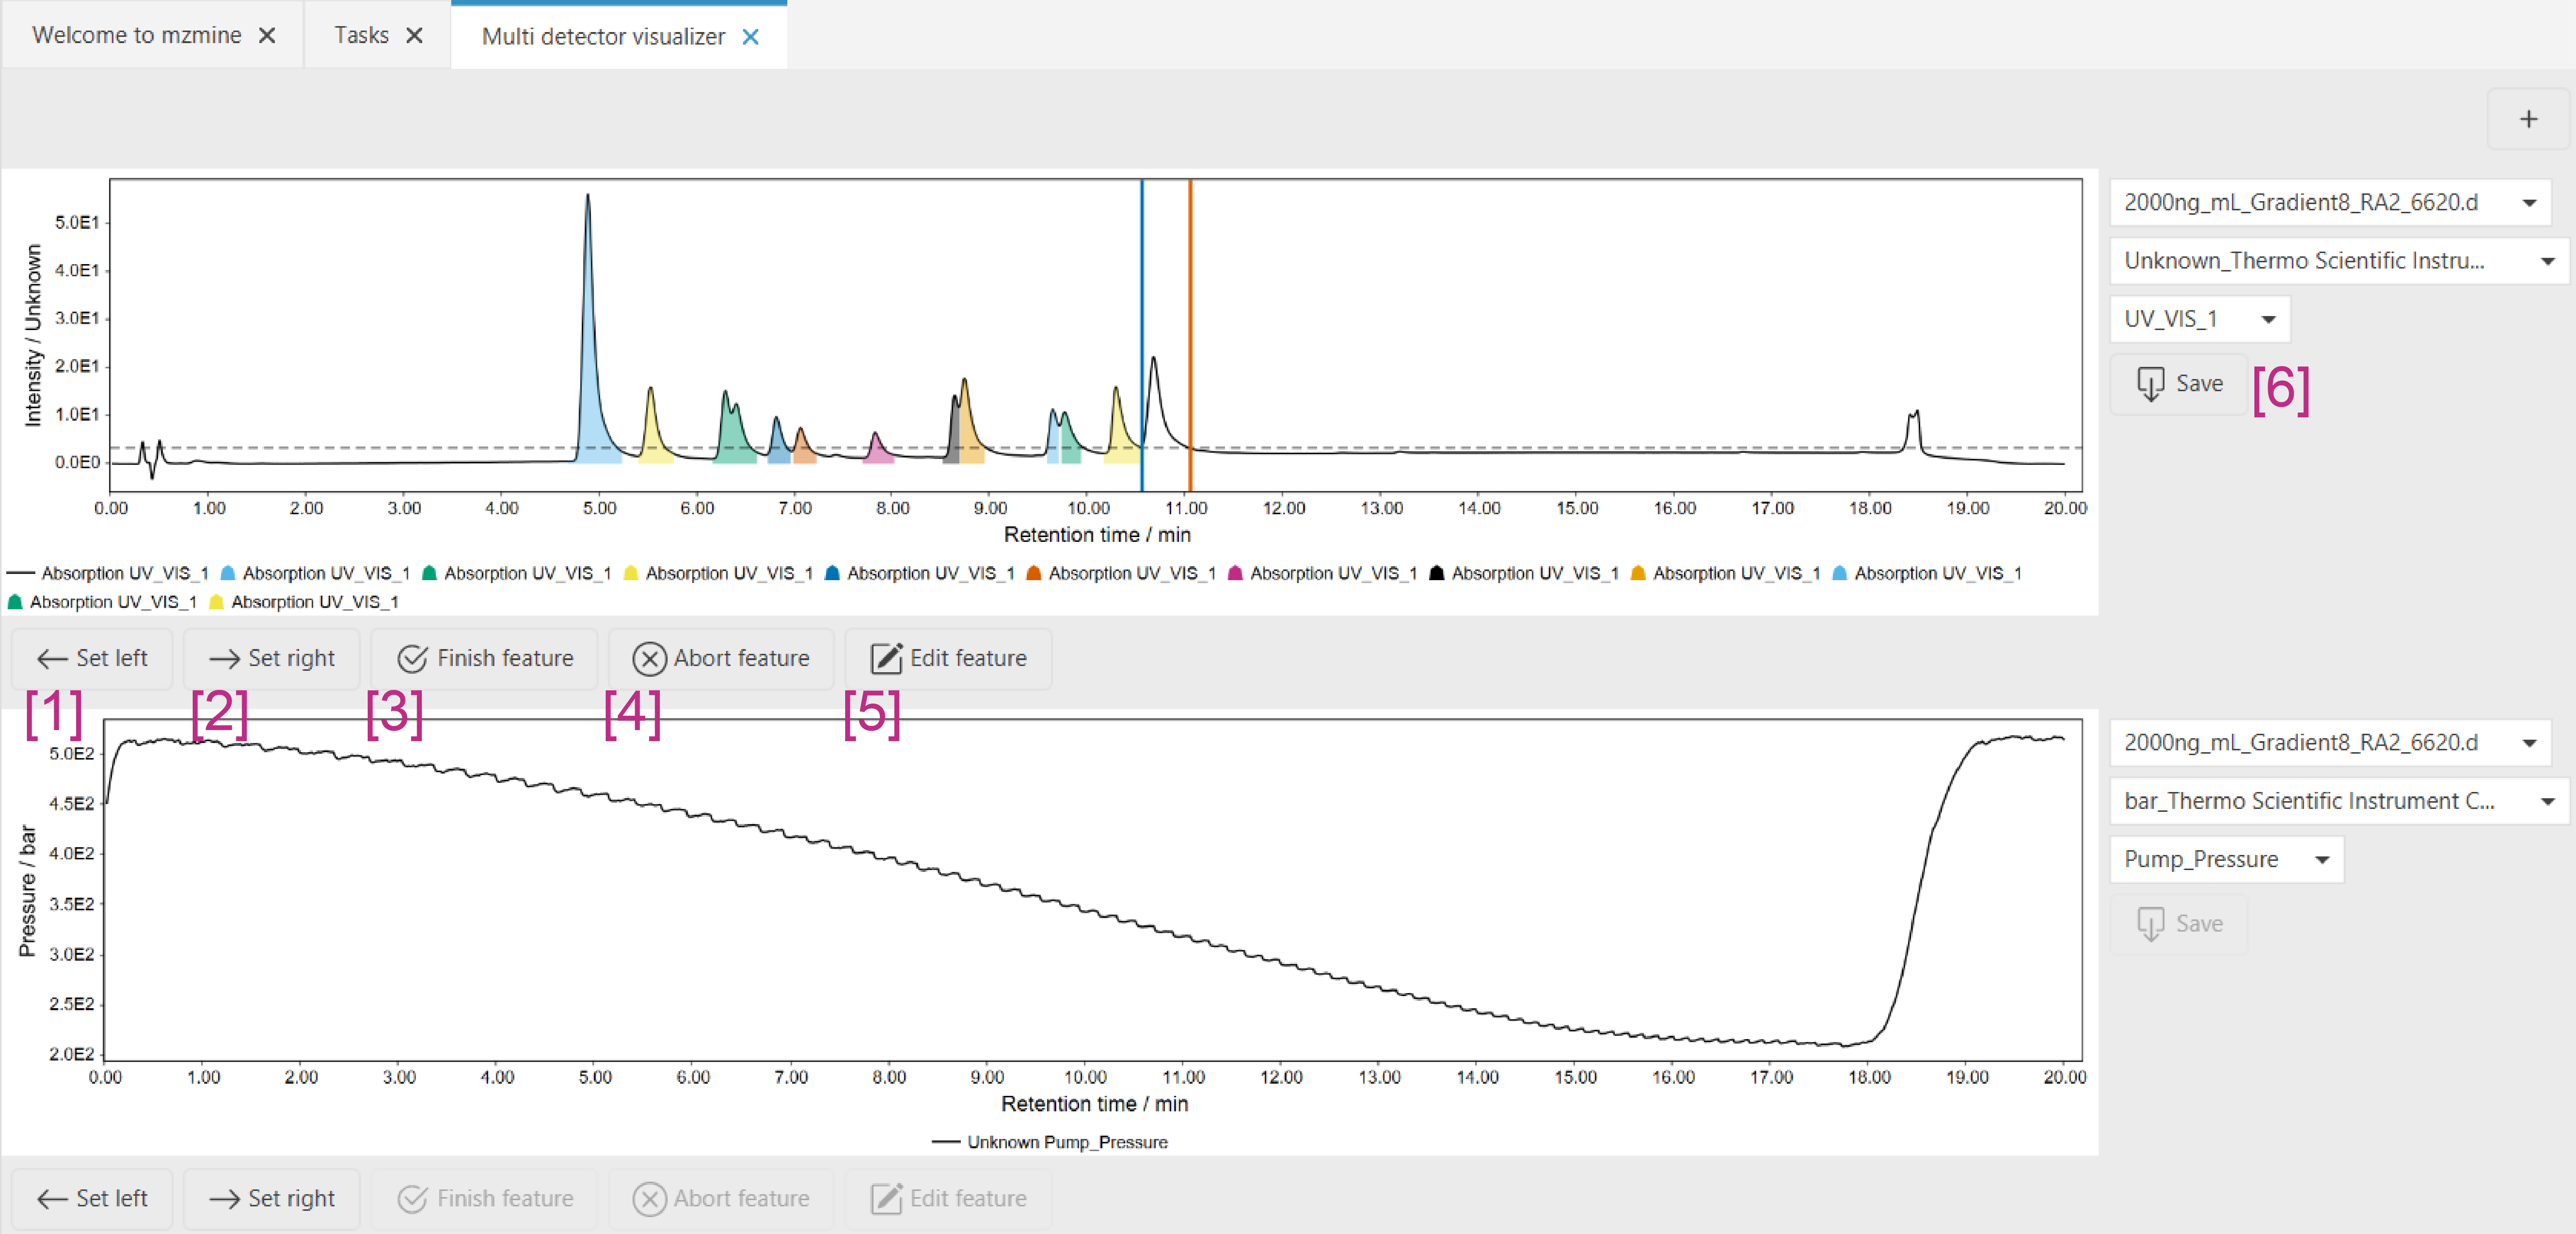
Manual integration is performed by first selecting the trace you want to integrate (see above).

- The left boundary of a peak is set by first clicking the "Set left" button and then clicking on the chromatogram in the chart or by holding CTRL/⌘↓+CLICK
- The right boundary of a peak is set by first clicking the "Set right" button and then clicking on the chromatogram in the chart or by holding CTRL/⌘↓+SHIFT↓+ CLICK
- After setting the left and right boundary, the integration is accepted by clicking "Finish feature" or by ALT↓+CLICK in the chart.
- In case a feature shall not be accepted and the boundaries shall be removed, you can use the " Abort feature" button.
- After a feature has been accepted, you can re-edit it, by clicking the "Edit feature" button. If you want to delete a feature from a trace, start the editing mode and then press "Abort feature".
- To save the manual edits, press the "Save" button. Unless "Save" is pressed, the edits will not be saved.