Data import
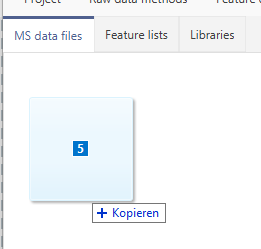
You can simply drag & drop the raw data into the MS data files tab of the main window. Alternatively, you can use the Import MS data module.
Info
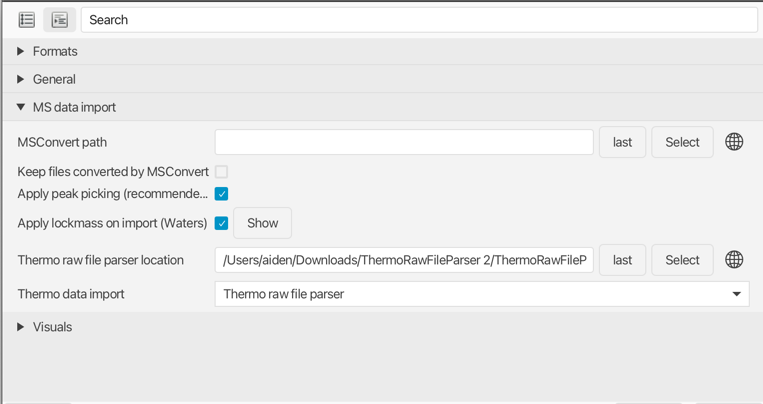
mzmine can use MSConvert for raw data conversion automatically. Make sure to setup the MSConvert installation path in the mzmine preferences.
MS data
Description
Raw data can be imported via Raw data methods → Import MS data. The module combines the import of many MS data formats (see formats) and adds advanced, format- and vendor-specific import options.
File names
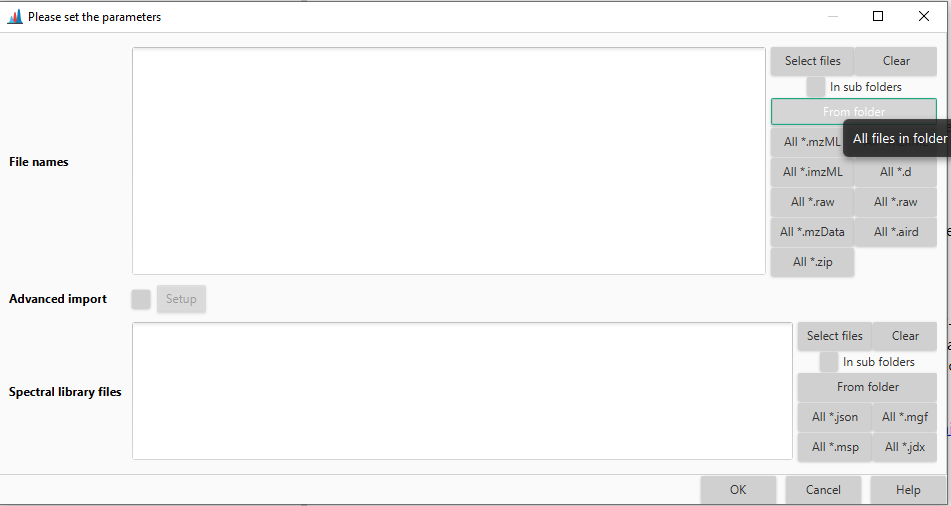
Click Select files or choose the preferred data format (All.) and browse the desired directory. All data files stored therein will be imported. The enabled option in sub folders* searches all files in the whole subdirectory tree.
Vendor data options
These options control how vendor-specific raw data is handled during import:
- Try vendor centroiding – applies the vendor peak picking during import/conversion where it is supported. Using the vendor algorithm usually gives better results than a generic one.
- Remove calibrant signals (Thermo) – removes internal calibration signals from MS1 and MS2 spectra of Thermo Orbitrap data on import. For MS level ≥ 3, use the Scan signal removal module.
- Apply lockmass on import (Waters) – applies lockmass correction for native Waters raw data imported via MSConvert.
- Waters MassLynx data import – selects whether Waters MassLynx files are imported via MSConvert or via the native Waters library. MSConvert can retain the converted mzML files (faster on re-import) but cannot centroid IMS data; the native import supports centroiding (by mzmine or Waters, the latter being slow for IMS).
- Pressure compensation (Bruker IMS) – optionally compensates timsTOF mobility values for pressure changes on import. This can only be applied during import, not afterwards. Usually not required for LC-IMS-MS files. In most cases a calibration in DataAnalysis is recommended, either manually or with a post-acquisition script.
Preferences as defaults vs. explicit settings
The same vendor options also exist in the mzmine preferences under Preferences → MS data import. The preference values act as the defaults for the import paths that do not open the import dialog:
- Drag & drop of raw files into the MS data files tab of the main window.
- Batch queues generated by the mzwizard.
In both cases mzmine takes a snapshot of the current preference values and uses them for the import.
When you instead run the Import MS data module directly (or edit an import step inside a batch), the Vendor data options are shown in the dialog and can be set explicitly for that import, overriding the preference defaults for that run only. Each option has a gear button that jumps directly to the corresponding preference.
Note
The import dialog and the preferences are independent copies. Setting a value in the import dialog does not change the preferences, and changing the preferences does not change a value that is already set in an open import dialog or in a saved batch step. A saved/loaded batch therefore always carries its own explicit vendor options rather than re-reading the preferences.
Advanced import
Scan filter
You can set up the scan filter to reduce the overall data. Options include e.g. polarity, or retention time range.
See Scan selection filters for all available criteria and combination rules.
Crop MS1 m/z
You can filter for a specified m/z range.
MS1 detector and MS2 detector
Tip
When processing very large datasets (hundreds to thousands of data files), the mass detection can be run during the import. All signals below the specified noise level are not imported (altering the raw data on the import), thus saving memory and processing time.
Set the mass detection parameters as described in the Mass detection section. The MS1 detector is applied to all scans with MS level ≤ 1, and the MS2 detector to all scans with MS level > 1. Each detector can be enabled independently. During import the selected detector replaces every scan's signals with the detected (centroided/thresholded) masses, and the result is stored directly as the scan's mass list (via a pointer to the already-processed data), which is where the memory savings come from.
Ion mobility (IMS) data: mobility scans and frames
For ion mobility files (e.g. Bruker timsTOF .d/.tdf, and IMS data of other vendors), the same mass
detection during import is applied at two levels:
- On each frame
- On every individual mobility scan contained in that frame.
When mass detection is active for a frame's MS level, both the frame's summed spectrum and its mobility scans keep their centroided data as their mass list (no separate copy is stored).
Warning
While it is slightly more efficient to do this during data import, only the processed data is stored and the unprocessed data is discarded. Only use this method if you have tested that the final results are the same, compared to splitting the data import and mass detection into two separate steps.
Caution
If you use a mzbatch file created by the mzwizard, make sure to remove the mass detection steps if you apply MS1 and MS2 detection during the import.
Denormalize fragment scans (traps)
This option denormalizes scans with MS level > 1, acquired with trap instruments, including Orbitrap or trapped ion mobility spectrometry (TIMS). When enabled, each scan is multiplied with the injection time resulting in "raw" intensities. If the injection time is missing in the data file, the scans remain unprocessed. This option is encouraged before spectral merging to reduce the intensity differences between scans acquired with different injection times.
Metadata file
Select this option,if you have a .csv of .tsv file with your metadata. If you need a template it is recommended to import all your raw data files into mzmine and then navigate to Project → Sample metadata. Select the export button in the bottom toolbar. The Format mzmine internal is recommended.
Extract sample metadata
Optionally extract sample metadata columns from the file name or path of the imported raw data files using regular expressions. This step runs after the metadata file import.
Sort and color
Warning
This option requires metadata
If selected, the raw data will be colored based on sample_type, which covers blank, QC, and sample.
Spectral library files
Select all spectral library files you want to import.