Development in IntelliJ
Set up
- Fork the mzmine (https://github.com/mzmine/mzmine3) GitHub repository (needs free GitHub account) (See https://help.github.com/en/github/getting-started-with-github/fork-a-repo)
- Download & Install IntelliJ IDEA (there is a free educational license for students and teachers) from https://www.jetbrains.com/idea/download/
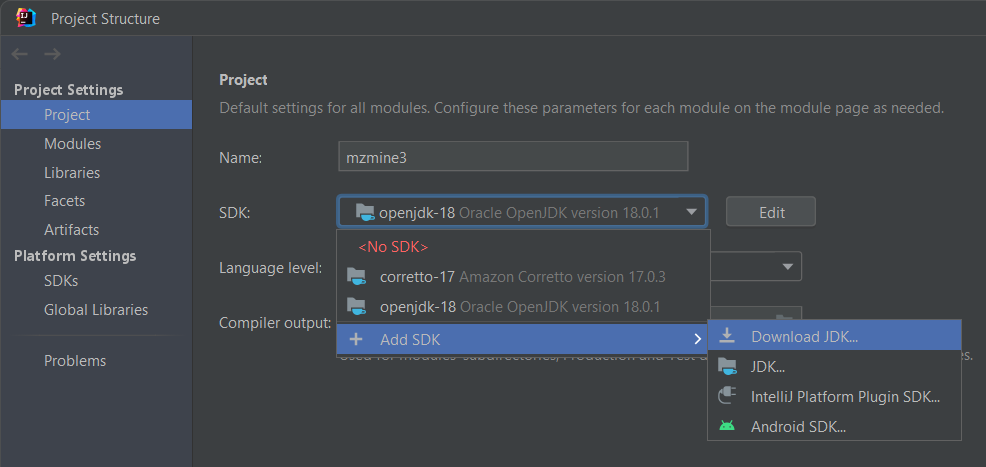
- Download & Install the current JDK. We recommend the OpenJDK. However, you can also use any other distribution, e.g., the Oracle JDK. This can be done from within IntelliJ. Open File/Project Structure (CTRL+ALT+SHIFT+S) and select SDKs and add the latest JDK with the +button:
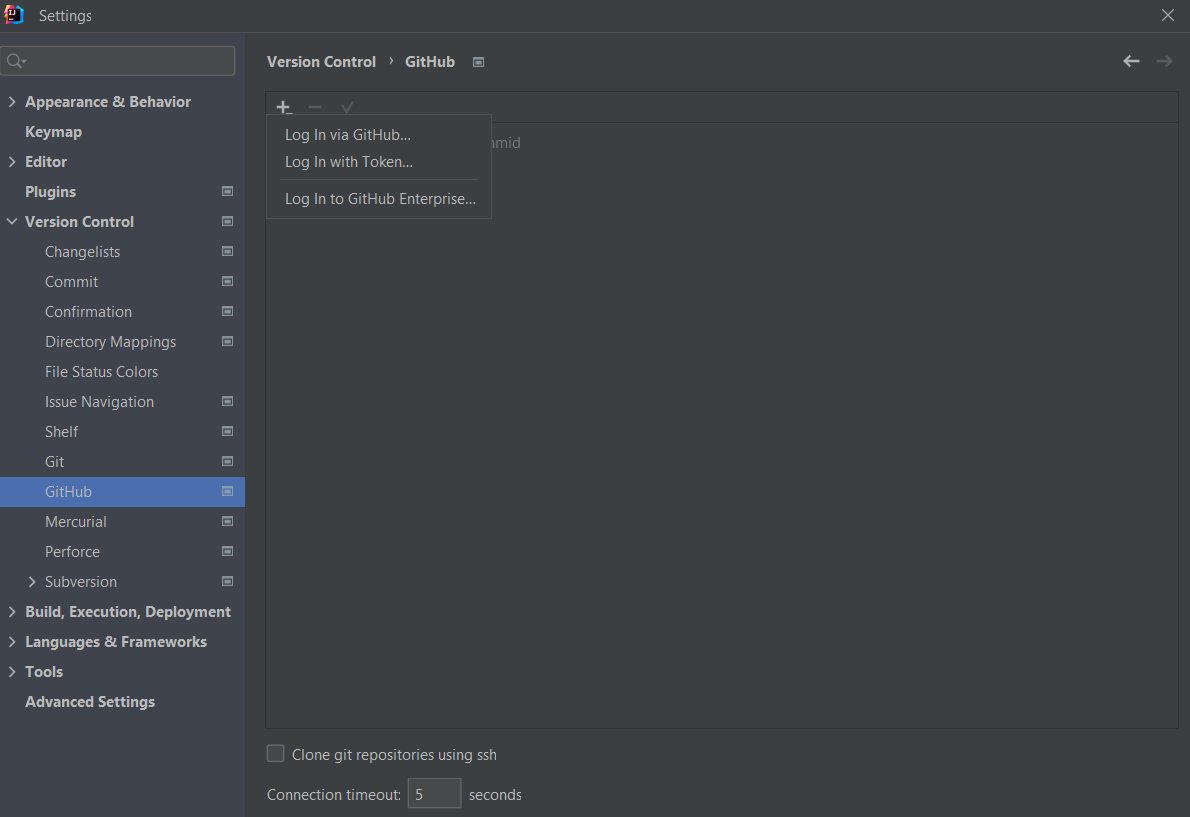
- Add your GitHub account via Settings/Version Control/GitHub +button. Below exemplified with
the Log in with Token... option:
- Log in with Token… Generate - redirects to GitHub
- Make sure to select the Workflow scope to avoid conflicts that arise from changing GitHub actions

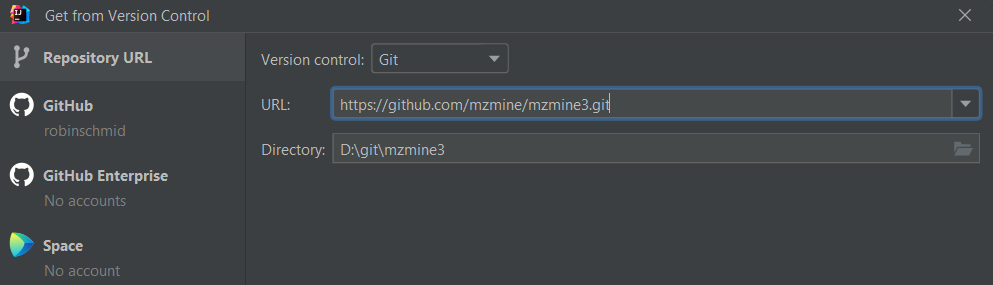
- Clone GitHub project via version control: File/New/Project from version control use your user
name to get your fork:
https://github.com/YOUR USERNAME/mzmine3.git
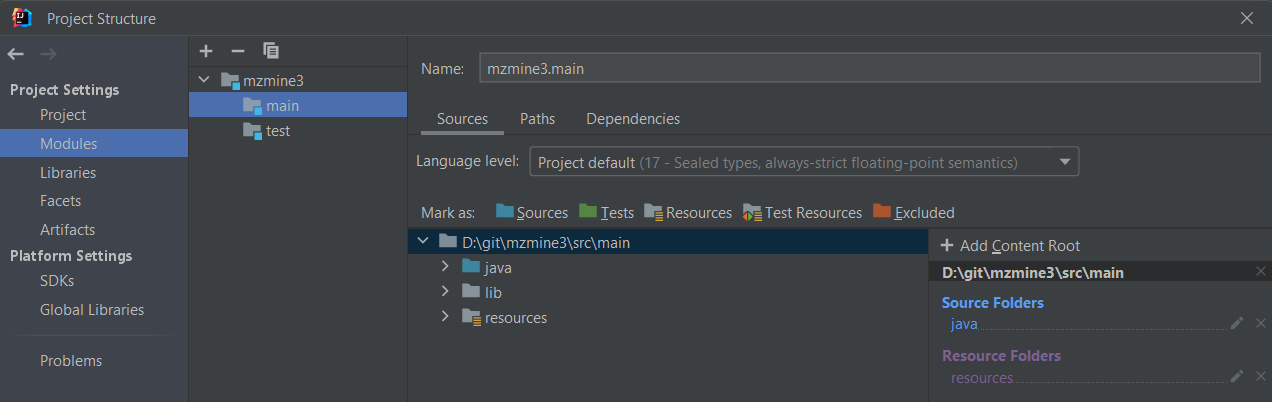
- Make sure that gradle runs and updates the project. Otherwise, click on Reload Gradle Project . Now the project structure (CTRL+SHIFT+ALT+S) should show the source, test, and resource folders which are described in the build.gradle.
-
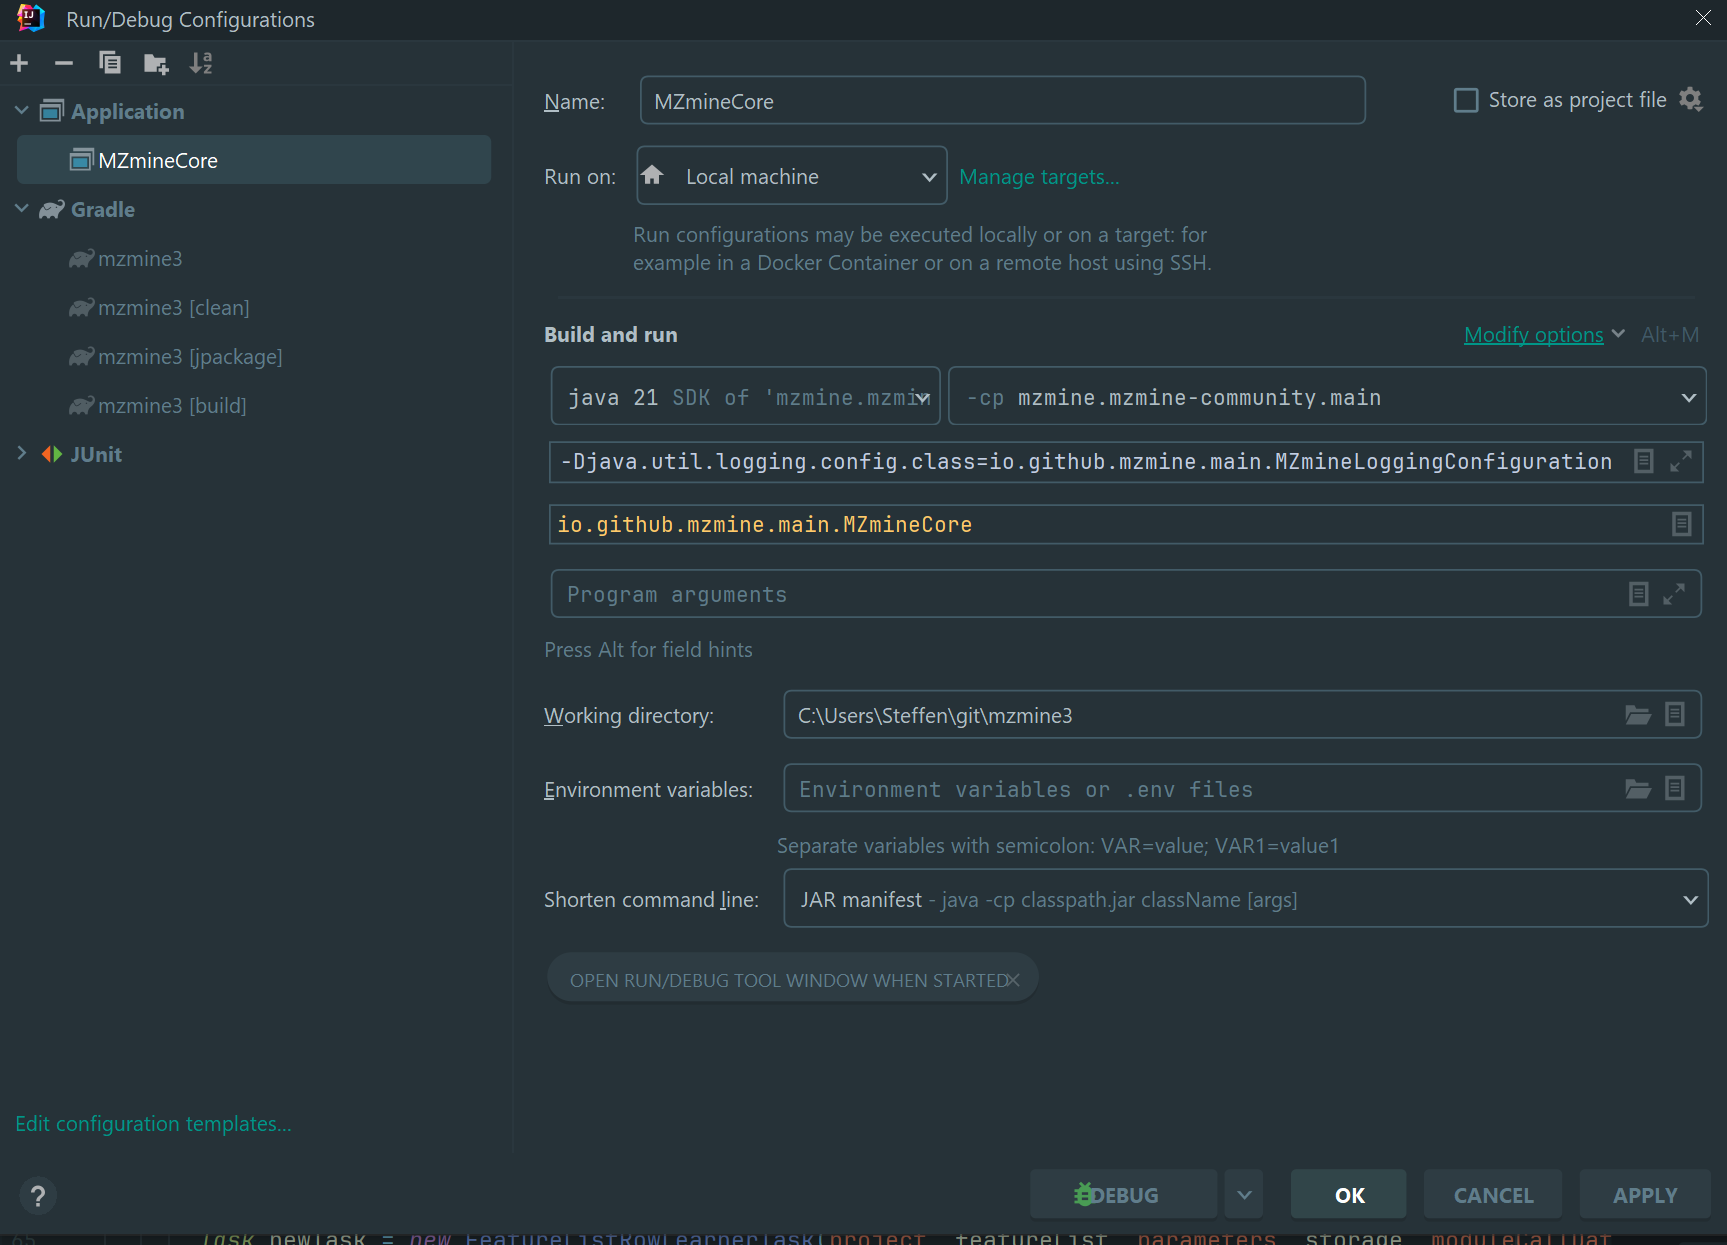
Click on Add a Configuration. Select “Application” from the template list). via the + button ( don’t just edit the template):
- Main class:
io.github.mzmine.main.MZmineCore - VM options (add via "Modify options"):
-Djava.util.logging.config.class=io.github.mzmine.main.MZmineLoggingConfiguration --add-opens java.logging/java.util.logging=ALL-UNNAMED -ea
- Main class:
-
Run or debug with this configuration
Code formatter
The code formatter is important for contributions to the main version of MZmine and each java file should contain the license header.
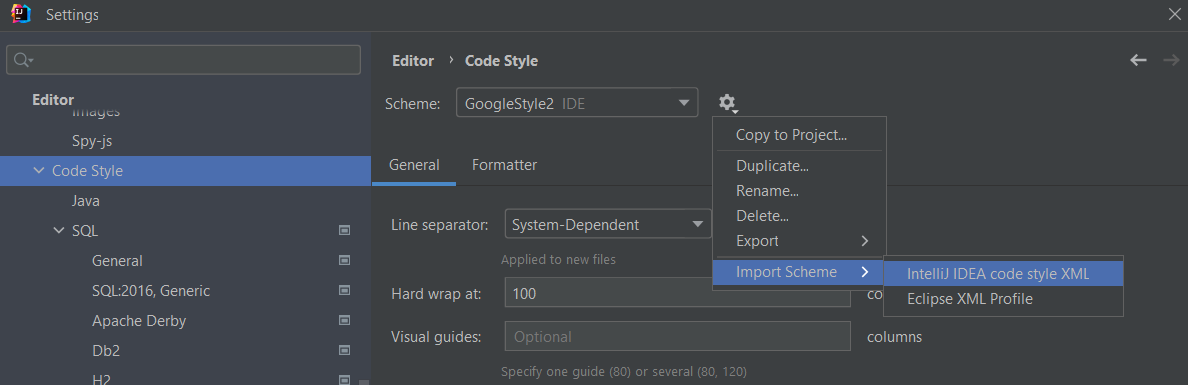
- Import the style format from
mzmine-intellij-code-formater.xml - Apply format to any file with CTRL+ALT+L
- Can also be applied on each file saved or each commited change (see below)
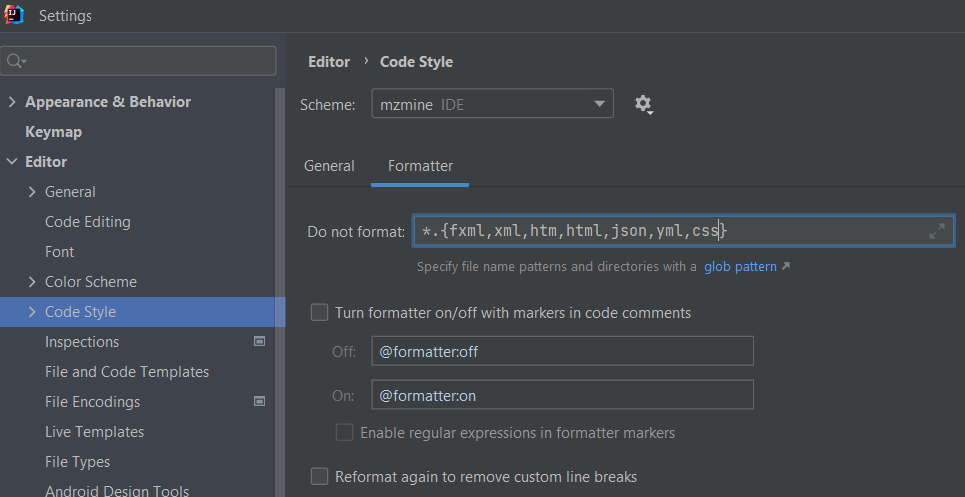
- Better exclude specific file formats from being formatted (see below screenshot
2) (
*.{fxml,xml,htm,html,json,yml,css})
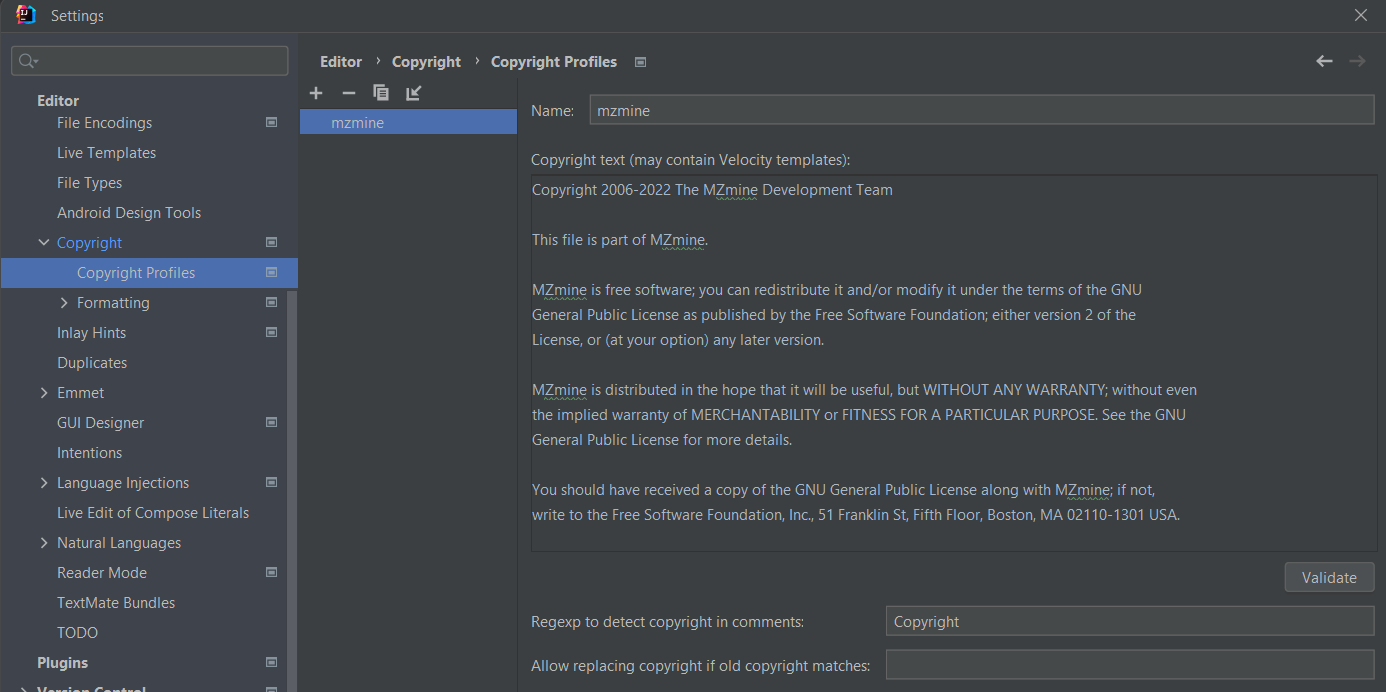
Copyright header
- Add the license header to each file - the easiest way is to add the copyright profile to intelliJ
- Import the copyright from
mzmine_intellij_licence_header.xmlor create a new one with the exact text specified inlicense_header.txt - Add a new scope for all project files
- Apply after file save or commit operation or run the Update copyright... action

Useful settings
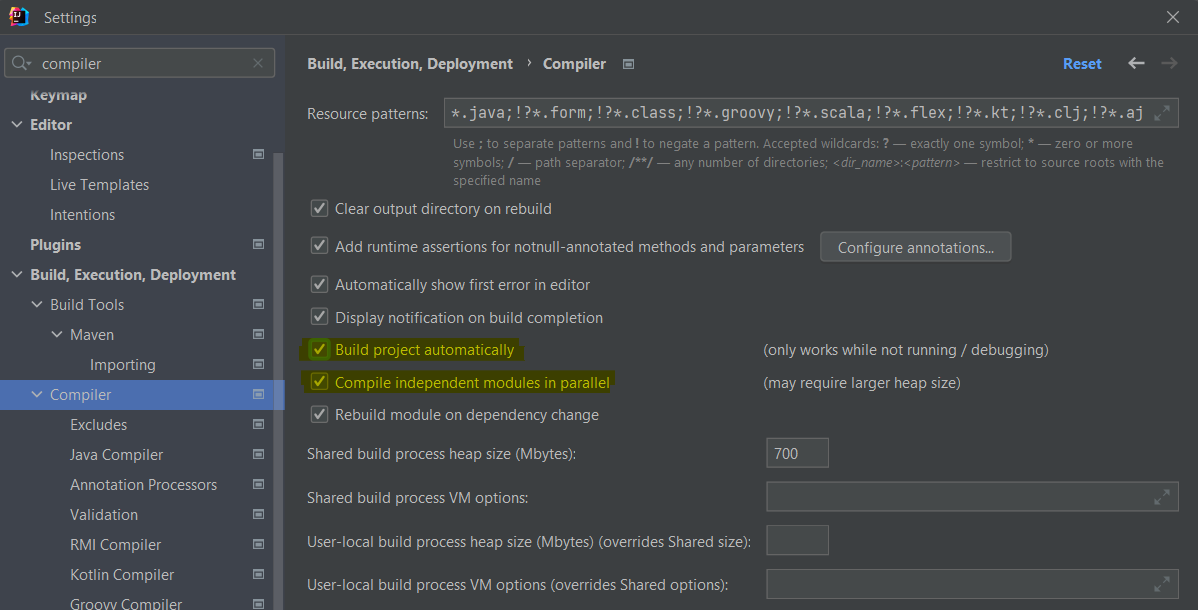
Faster building
- Activate auto building (consumes more resources)
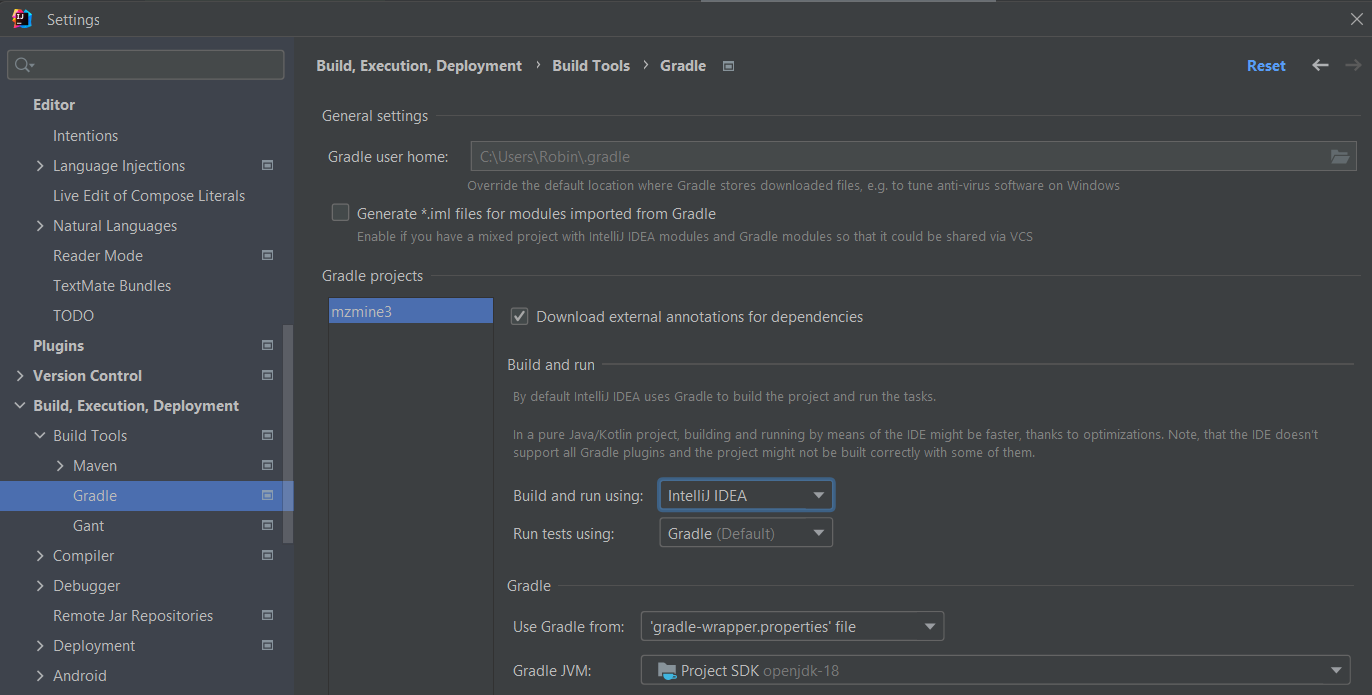
- Set Settings/Gradle/build and run to IntelliJ
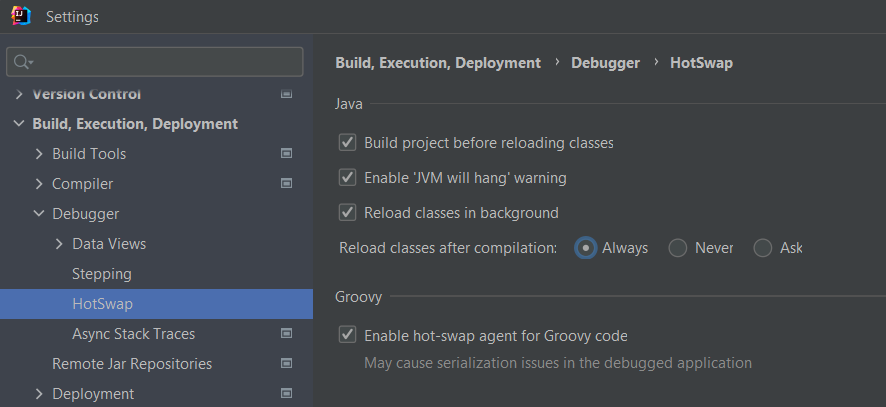
- Activate HotSwap to automatically load changed classes during debugging
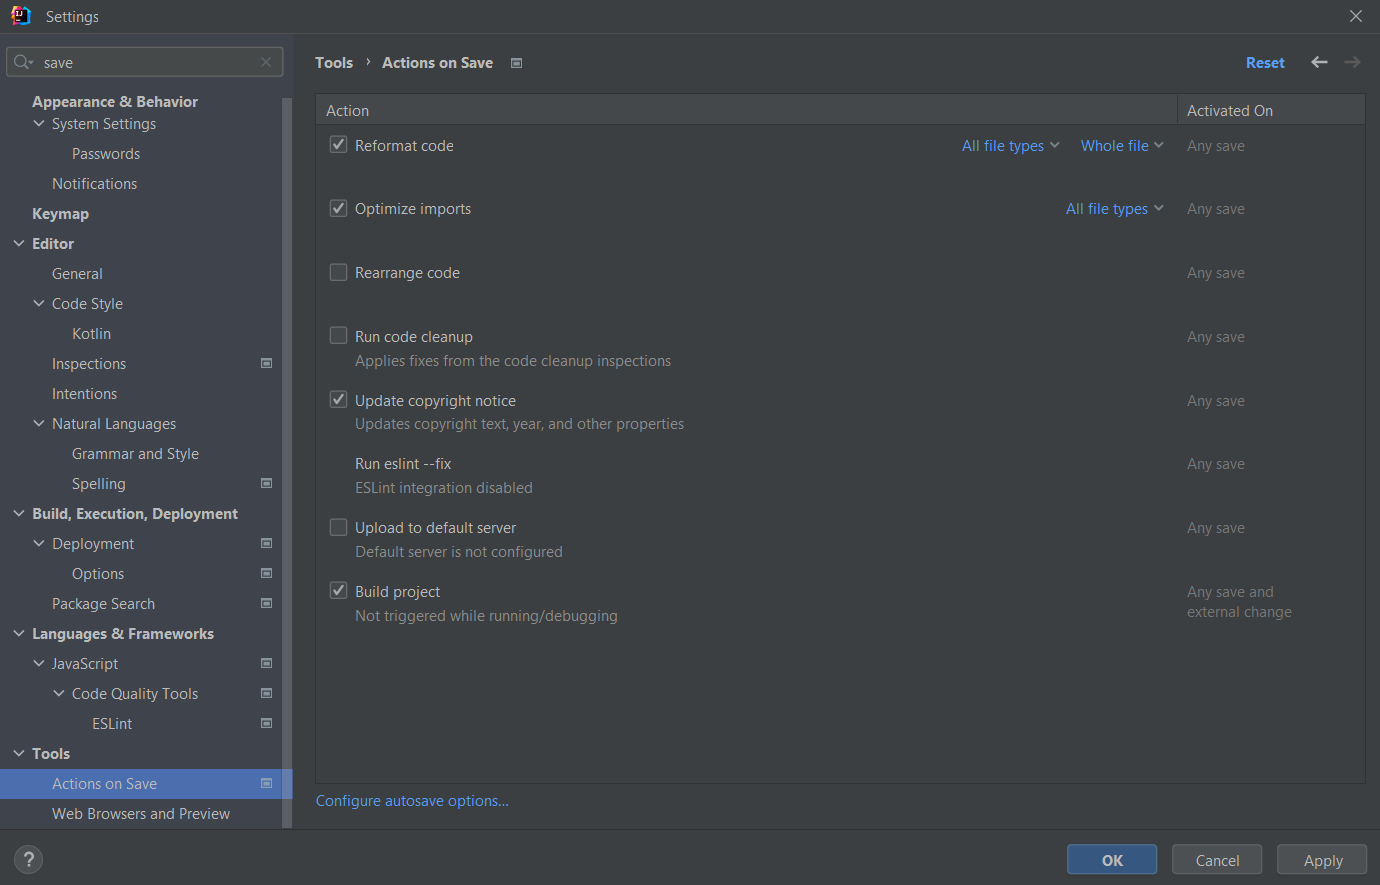
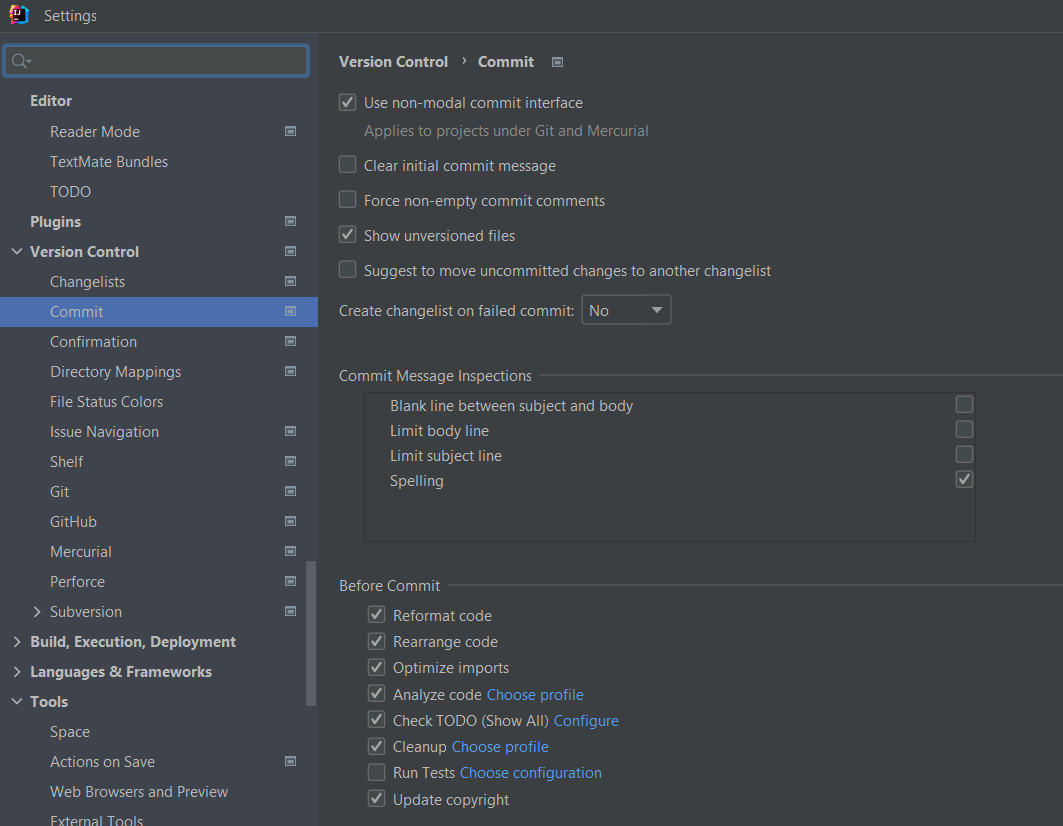
Save and commit actions: Apply copyright, format, etc
Select any actions to perform when a file is saved or committed.
Live templates
Live templates are used to add custom entries to the code completion, e.g., to quickly create a
class-specific logger.
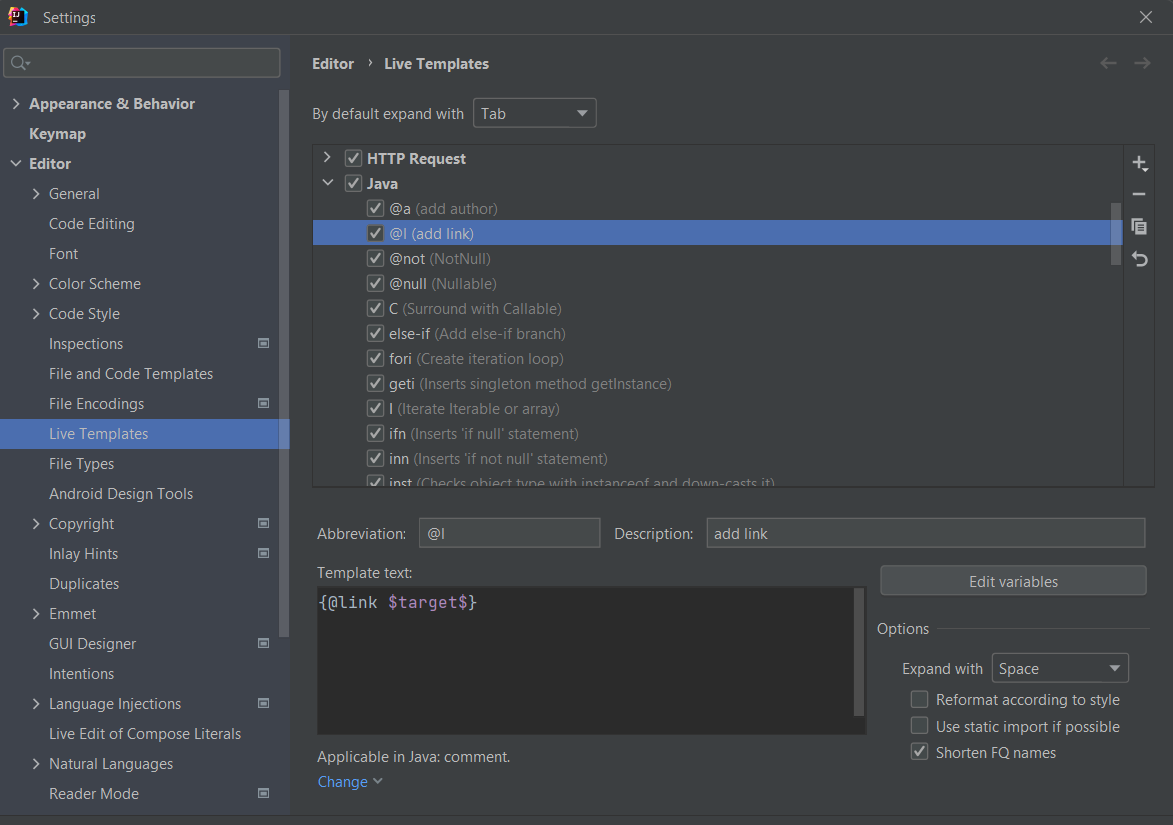
Access Settings/Editor/Live Templates (CTRL+ALT+S on Windows) and add a new template (+ button).
Define the
abbreviation to trigger autocompletion at this statement, define the template text, and change the
target context
(“Java”) at the bottom. The template below generates a logger after typing log and pressing
CTRL+SPACE. The variable
$CLASS_NAME$ was set to represent the current className() under Edit variable.
The template:
private static final java.util.logging.Logger logger = java.util.logging.Logger.getLogger(
    $CLASSNAME$.class.getName());
Generates the output in class Scan:
private static final Logger logger = Logger.getLogger(Scan.class.getName());

Another example to create Javadoc links for @l . The variable (here $target$) places the cursor.
Postfix templates
Postfix templates allow to surround a preceeding variable or expression with code. Similar to live templates but after the expression. Go to the settings (CTRL+ALT S on Windows) and search for postfix templates. Click on the + button to add a new Java template. Add a key, specify the minimum java version, check "Use static import if possible" and enter the following expression text:
- key: nne
- expression:
Objects.requireNonNullElse($EXPR$, $END$)
This will enable the following:
// input as variable.nne ...
spectrum.nne
// ... auto complete will produce with _ being the cursor position
Objects.

requireNonNullElse(spectrum, _)

// ... or this when "use static import" is activated
requireNonNullElse(spectrum, _)
Troubleshooting
Correct JDK selection
Make sure the correct JDK is set in these places:
- File/Project Structure/SDKs
- File/Settings/Build, Execution, Deployment/Build Tools → Gradle → Gradle JVM → “Project SDK” this will update automatically if the project SDK changes.
- File/Settings/Build, Execution, Deployment/Java Compiler → Project Bytecode version → 21 (for JDK 21) Correct run configuration: Select Default JRE (this will update with the project sdk) or select the correct one manually.
Could not target platform
Error: When building via gradlew: “Could not target platform: 'Java SE 21' using tool chain: 'JDK 13 (13)'” Solution (Windows): Set the JAVA_HOME environment variable to the JDK 21 root directory. See https://docs.oracle.com/cd/E19182-01/821-0917/inst_jdk_javahome_t/index.html
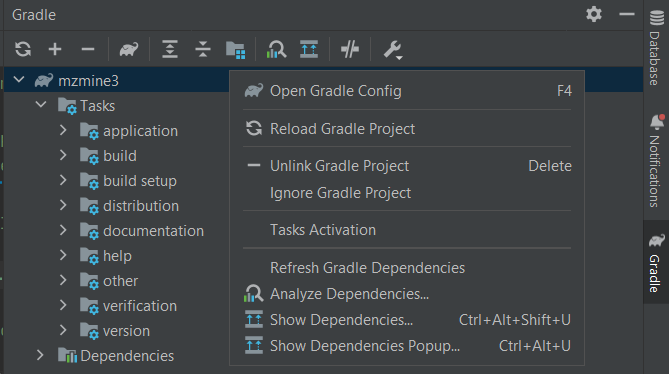
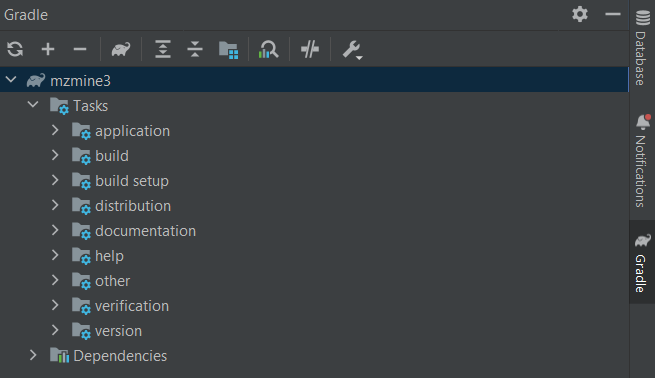
Gradle project not imported
If gradle tool window is not shown:
- To import the Gradle project navigate to the build.gradle in the project tool window right click → import gradle project. The gradle tool window should now be visible.
- To update the imports click the update gradle project button in the gradle tool window